Client Audio
This page explains how to use your ShackConnect Client's audio to RX / TX in digital modes from external apps.
Prerequisites
Add and connect CLIENT AUDIO node
Go to SETUP and click the 'ADD NODE' button in the header bar.

In the panel that appears in the bottom of the screen, select CLIENT → CLIENT X → USB.
You should have a CLIENT AUDIO node available.
If you do not see any nodes in this menu
- Check if the Client is connected.
- Check if you do not already have all available client resources placed in the canvas (you can click on them and hit the DELETE key or click the thrash can icon to restore them back into the ADD NODE menu).
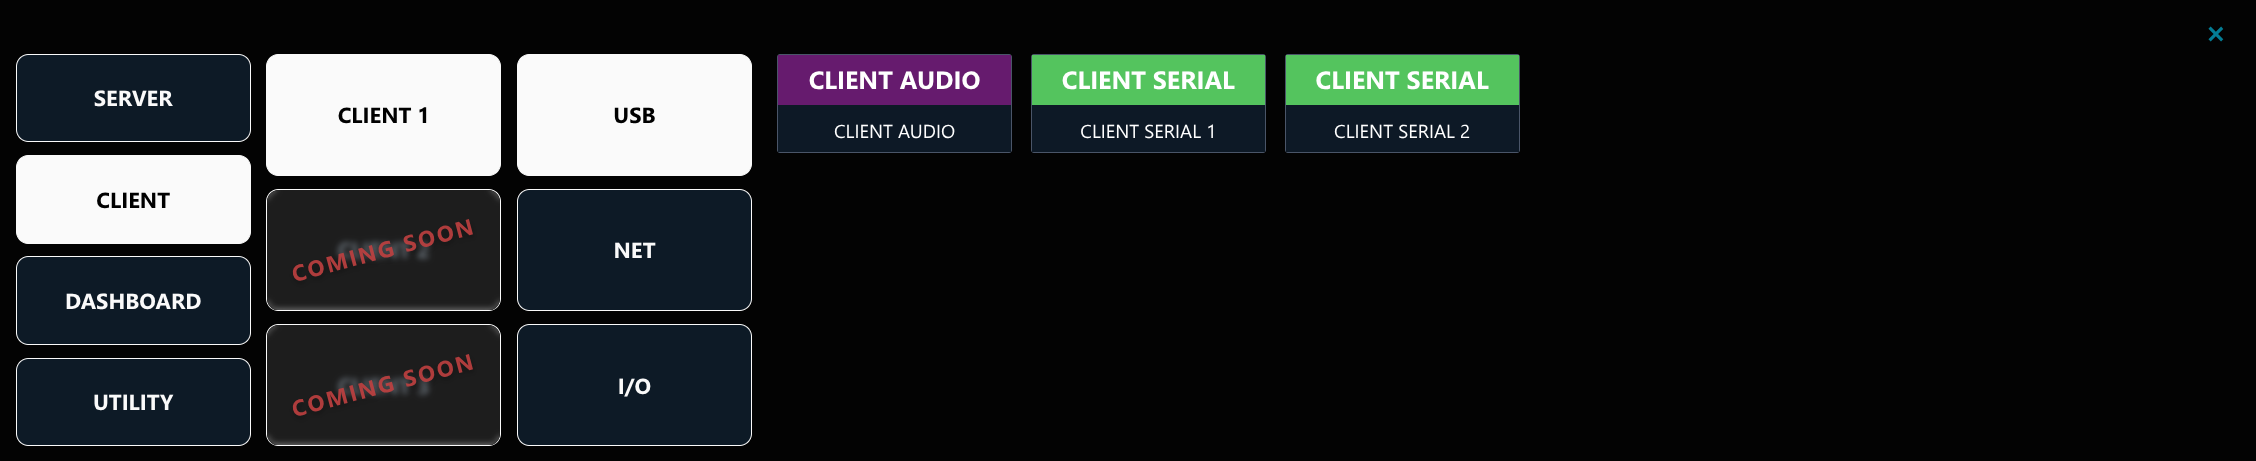
Drag a CLIENT AUDIO node into the canvas.
If you do not have an AUDIO MUX node in the canvas, add it from the ADD NODE → DASHBOARD menu and connect it from the right side to the RX and TX ports on your server-side radio device by dragging from the arrow handles.
Connect both the RX and the TX port on the CLIENT AUDIO to the AUDIO MUX node from the left side.
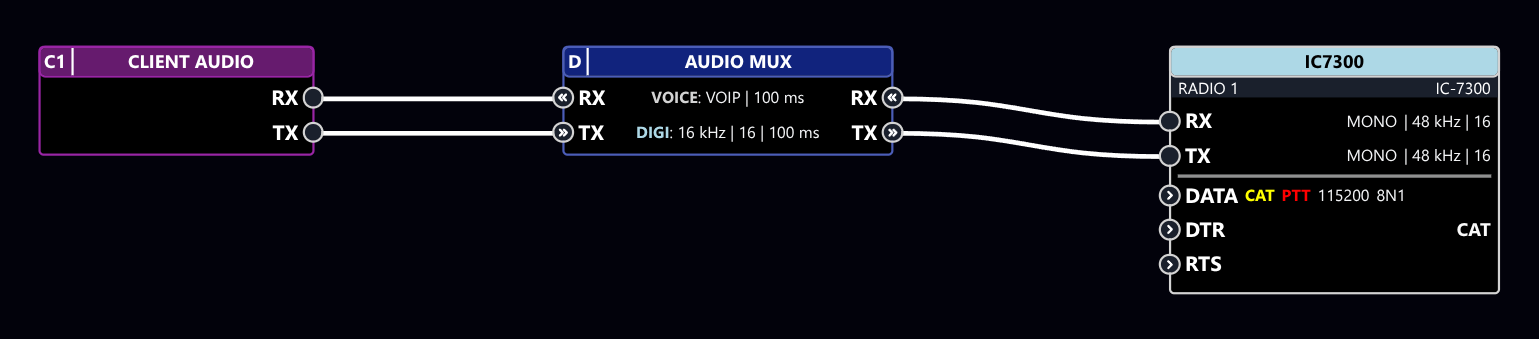
The DIGI codec on the AUDIO MUX node will get highlighted in blue color, indicating the DIGI mode sound card (CLIENT AUDIO) is in use.
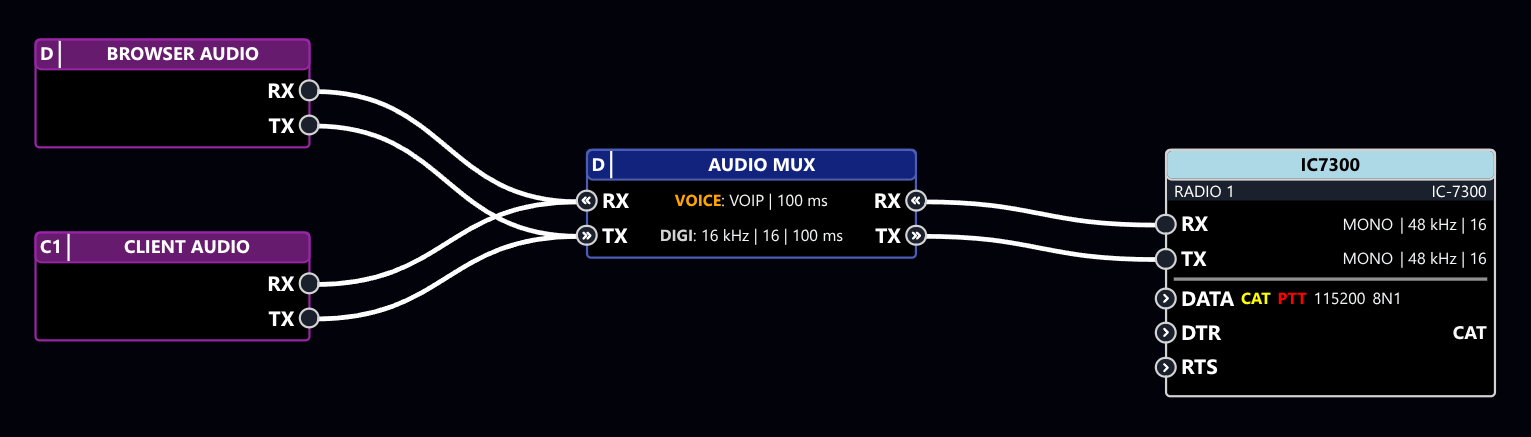
If you connect both the BROWSER AUDIO and CLIENT AUDIO nodes to the AUDIO MUX, the mux will default to whichever sound card you connected first. Learn how to switch between the sound cards at runtime.
Click the RUN button in the header bar to start streaming, then open the Client sound card as playback / capture in your digital audio mode application of choice.
To verify the Client sound card is receiving audio from the server-side radio, enable listening to the capture device in your OS's audio control panel.
Configure audio codec
By default, the DIGI sound card (CLIENT AUDIO) uses a lossless audio codec to allow maximum quality in digital mode RX / TX. However, this requires a high-speed internet connection on both the client and the server side; otherwise you will experience audio dropouts.
If you experience audio dropout issues when DIGI mode is selected in the AUDIO MUX, we recommend switching to the lossy codec, which should still provide high-enough quality for most users and uses significantly less network bandwidth.
You can also try increasing the DIGI mode buffer size, which will help with jittery networks at the cost of additional latency (this will not help if the underlying issue is limited network throughput rather than jitter).
You can also lower the bandwidth requirements of the lossless codec by lowering the sample rate or bit depth.
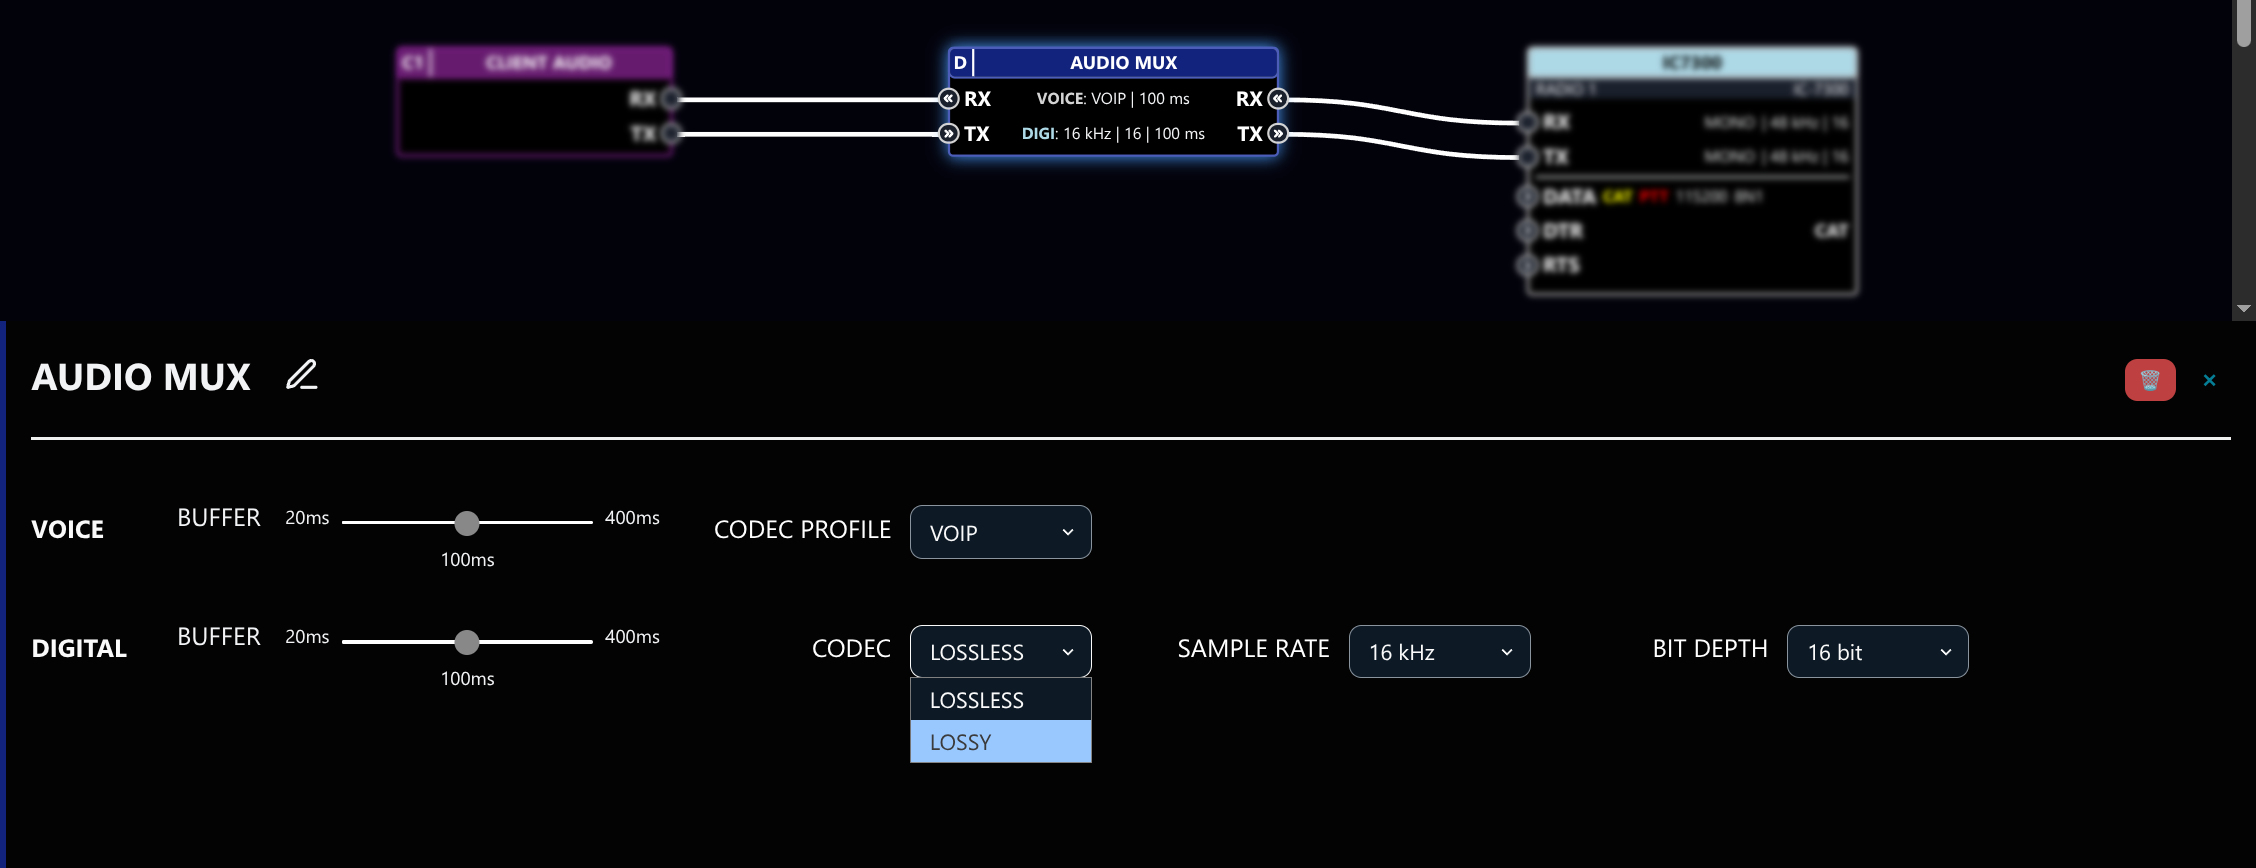
You can also increase the codec sample rate / bit depth to achieve maximum audio reconstruction quality, or lower the buffer size to get better latency.
If you were in streaming mode, you must first hit the STOP button in the header bar before you can edit the node wiring or configuration, or place and delete nodes.
You can remove existing nodes and wires from the profile by clicking on them, then hitting the DELETE key or clicking the thrash can icon.
Use BROWSER AUDIO and CLIENT AUDIO concurrently
You can connect both a VOICE mode sound card (BROWSER AUDIO) and a DIGI mode sound card (CLIENT AUDIO) to the AUDIO MUX at the same time.
This allows you to switch between voice and digital mode operation at runtime.
If you do not have an AUDIO MUX node in the canvas, add it from the ADD NODE → DASHBOARD menu. Connect both the RX and the TX port on the BROWSER AUDIO to the AUDIO MUX node from the left side.
Go to your dashboard.
If you do not have the AUDIO MUX controller placed in the dashboard canvas, add it by clicking 'ADD CONTROLLER' in the header bar and dragging it into the canvas from the bottom menu (stream must be stopped).

Click the RUN button in the header bar to start streaming, and use the VOICE / DIGI switch in the top row of the AUDIO MUX controller to switch between BROWSER AUDIO and CLIENT AUDIO.
In VOICE mode, BROWSER AUDIO is used for RX and TX (headphones and microphone icon will appear in the header bar next to the STOP button), and CLIENT AUDIO is completely disabled.
In DIGI mode, CLIENT AUDIO is used for RX and TX. BROWSER AUDIO still receives sound but cannot be used for TX (only the headphones icon will appear in the header bar).